
How and why we adopted Electron for warehouse tools

At Echo we operate our own warehouse and deal with the logistics that come with it, delivering tens of thousands of medications to patients every day. Over the last three years we’ve built up a large amount of in-house tech and tools that allow us to do this smoothly and scale with our ever-increasing number of patients.
This blog post explains how and why we started using Electron - the cross-platform web technology app framework - for these tools.
Background
To understand how and why we use Electron in our internal tools, it’s important to first roughly understand the various steps a patient’s medications must go through before being passed on to a courier.
The happy path at a very, very very high-level looks something like this:
- Getting a Prescription — Everything starts with a patient placing a request for a medication on our app. This triggers some automated comms to their GP requesting a prescription. We have to do this because we can only send medications based on a prescription from a GP. Typically a few days go by (depending on the GP) before we hear back.
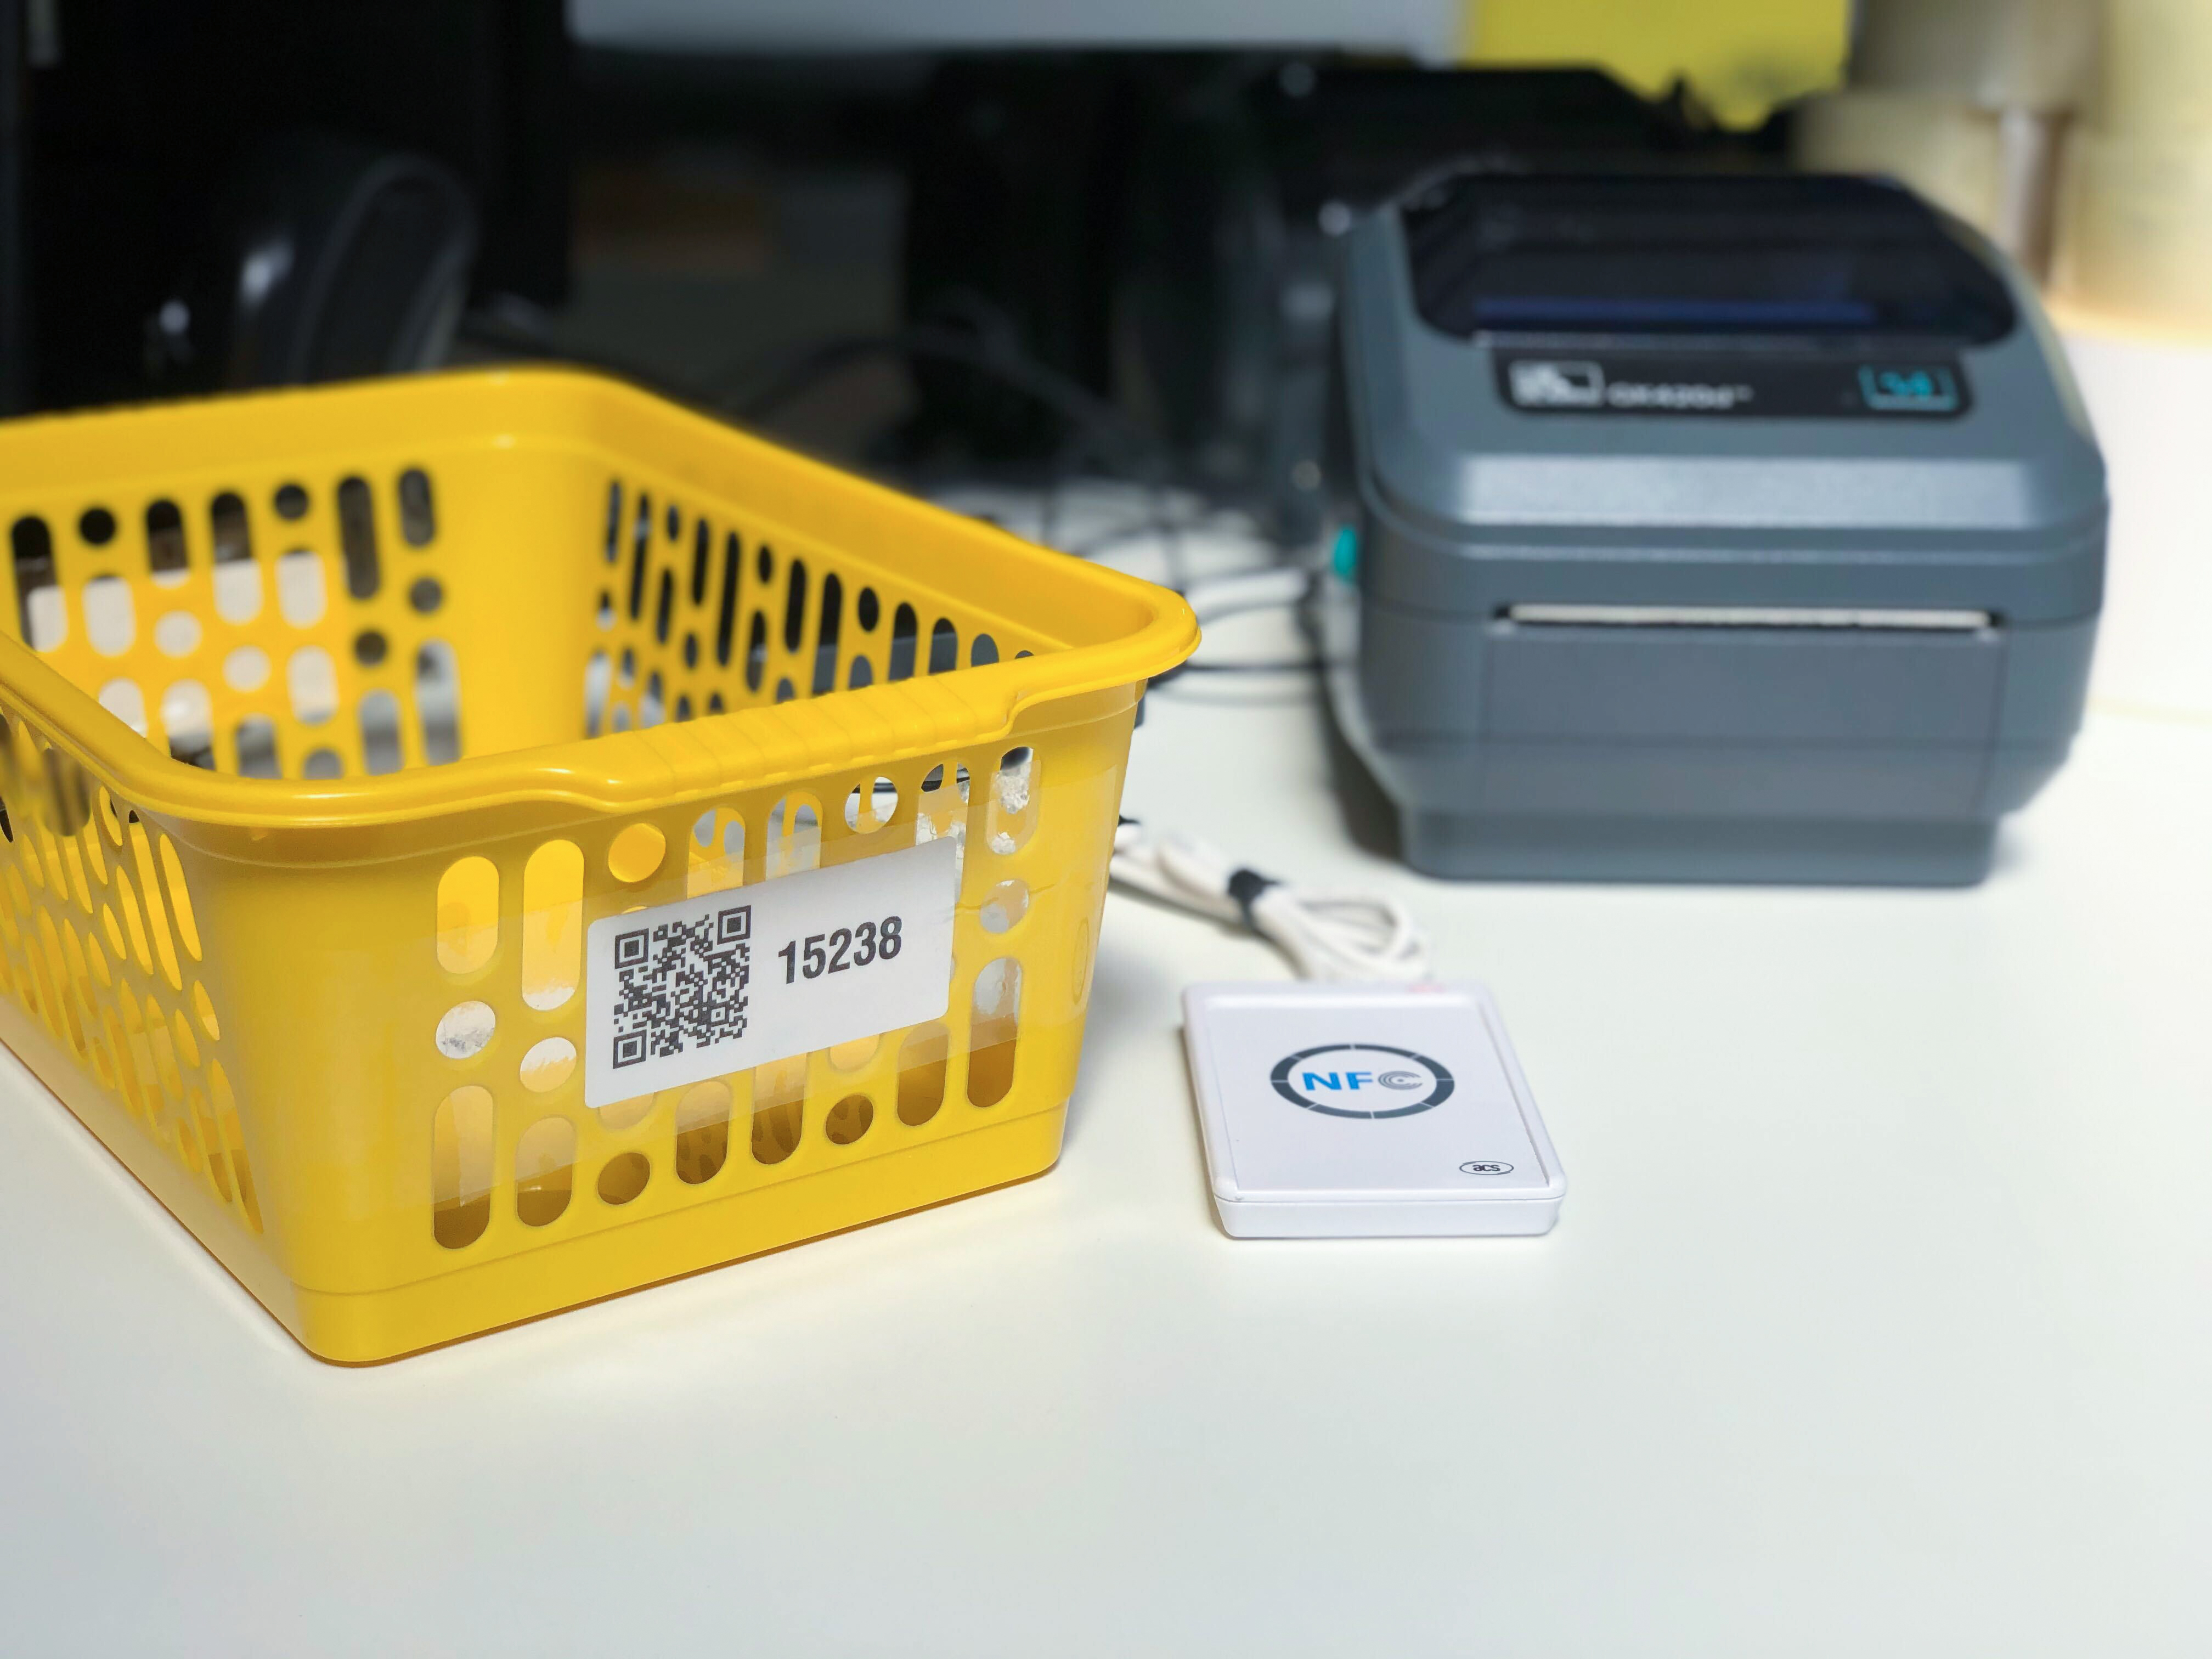
- Picking — Once we’ve received a prescription we ‘pick’ the medications. This means finding the right strengths, packs, and combinations of medications in our warehouse that match the prescription. Medications are paired to a barcoded basket. As the basket moves through the warehouse, it is then scanned at every step so its progress can be tracked.
- Dispensing — Next we assemble the patient’s medications. At this point each medication is checked against the prescription and any excess tablets are removed. If everything is correct, a label with dosage instructions (e.g. “Take twice daily after a meal”) is printed and stuck onto each pack.
- Checking — A pharmacist double checks everything again. In addition to checking that the medication is correct, each label is checked against the pack and the prescription. The pharmacist also clinically reviews what you’ve been prescribed. They make sure that the medications can be taken together, that the expiry date is after the last course of the medication, that your GP’s instructions don’t have any typos, etc.
- Dispatch — Finally, the medications are scanned once more and put in a parcel. A shipping label for the chosen parcel size is printed and stuck on.
The problem
While the specifics of our processes are not particularly relevant here (but hopefully interesting!) there are a few things worth noting from a technology point of view.
Security
At a number of stations throughout the warehouse, the prescription for a patient must be shown to pharmacists in order do various tasks. This is obviously a highly sensitive piece of information so we want to be in tight control of who can do what. We also need to be able to trust our audit logs and know who saw which prescription and took which actions. This is made difficult due to the nature of working in a warehouse: stations are often used by different people as shifts start and stop. In other words, logging in and out has to be both extremely quick and secure so that no-one has an incentive to leave a station logged in when they go for a break or switch station.
While good security could in theory be reached by enforcing 2FA and safe passwords, we’ve seen people stay logged in at their work stations because logging in and out repeatedly was too slow. Also, 2FA requires that people have their personal phone on them which itself is not great.
After some research we decided that the best option would be to use NFC Yubikeys with a short PIN. It should work like being a cashier in a supermarket where you can quickly tap in and out of different tills without your personal phone.
The technical requirement to make this possible is being able to use NFC pads to talk to Yubikeys.
Printers and scanners
At nearly every station we either have to print something or scan something, often both.
If we only needed to scan we could set up our scanners as keyboards so that when they scan something they 'type' the barcode like a normal keyboard. Using scanners like this is mostly okay, but can sometimes cause issues with focus states in apps. For example, if you are focused in an input waiting for someone to type something and they then need to scan something, they have to first click out of the input to un-focus it.
Printing however doesn't have an easy escape hatch like with scanners. Fortunately for web security, but unfortunately for us, web has very poor support for programmatic printing. You can easily open a print dialog but not kick off a print without the user confirming it.
In other words, to support scanners and printers well, we need to be able to talk to these devices via serial. Unfortunately, given the lack of serial support on web, this means you have to build things natively.
Cross platform support
In order to mark a medication as dispensed, we partly rely on software that we licence which runs exclusively on Windows.
Elsewhere in the process, in order to be able to cheaply scale all of our other in-house tech stations, we exclusively run Linux machines on small Intel NUCs which are teeny tiny and inexpensive computers.
Despite all this, we still want it to be as easy as possible for us as engineers to work on all of our apps — no-one really wants to have to switch OSs to work on different warehouse apps, adding yet another OS to the list: OSX.
This essentially left us with a scenario whereby we have to support three different operating systems 😭 for most of our apps:
- Windows: for 3rd party Windows software needed in the warehouse to dispense medications
- Linux: for our our stations in the warehouse (e.g. dispatch)
- OSX: for engineers to be able to work on warehouse tools easily without switching computer
The solution
As a proudly small engineering team, this was quite an overwhelming amount of requirements to cover.
Some options we discarded immediately:
- Building multiple native apps for Windows, Linux, etc. We believed that based on our team size and experience, there was no way we’d be able to move quickly enough while having to maintain and build for different operation systems natively.
- Try and do everything through a website and forfeit some of the above requirements/goals. This would have meant not being able to programatically print and would require YubiKeys to be plugged in via USB (where they work as a keyboard). We felt this wouldn’t offer us a good enough base on top of which to build reliable and fast warehouse apps.
- Building a Chrome app. This actually would have fit the bill well, since they are cross-platform, support serial as well as printing. Unfortunately, though, Chrome Apps are being deprecated, and relying on a soon-to-be-deprecated technology felt like a bad idea.
Enter stage right: Electron. Despite no-one in the team having had direct experience with Electron, we knew that the core premise of being able to build cross-platform apps would be a good fit for our problem.
Additionally, due to Electron apps being built in normal web technology (i.e. Javascript, HTML, and CSS), it fit very well with the team’s primarily web-based expertise.
At Echo we’ve repeatedly made technology decisions by prioritising tech stacks that the team is familiar with, and so far it has served us well. Sharing tech across platforms/projects has meant we’ve been able to keep the team size small and has also allowed all of our engineers to contribute to (almost) all projects with a minimal ramp-up.
Electron being Javascript based also meant we could leverage the extraordinarily huge eco-system of node/NPM packages (both internal and external) that hardware communities have created to interface with serial devices and such.
Building our first Electron App
Fundamentally, Electron Apps work in two separate processes, the “main” process and a “render” process per window of your app. The best way to understand this is to compare Electron to a normal browser. In a normal browser each tab is a (almost) completely sandboxed environment where each tab is blissfully unaware of other open tabs. In Electron, however, different windows (which you can think of like browser tabs) can talk to and co-ordinate via the main process.
Electron’s own docs explain this much better than I will be able to :)
Based on this, the ‘vanilla’ way to build Electron Apps is to build a website like you normally would but each of your app's windows can loads a different URL.
You would then package it into a single binary that you can run on the different operating systems that you target. These binaries include all the HTML, Javascript and CSS required by your app. It’s kind of like having a website where your ‘server’ is Electron... if that makes any sense.
We felt the downside of this approach was distributing our apps. On every release we wanted to be able to deploy quickly and without having to rely on any platform-specific app store or anything of the like. While there are excellent projects trying to make this part easier, such as Electron Builder which provides support for auto-updates via Github Releases, it still felt like there might be a different, better way.
This is when we started investigating so called 'hybrid' Electron Apps. Hybrid Electron apps are different to other electron desktop applications in that website is hosted on an external URL instead of all files being part of the app itself on your computer. In this architecture Electron ‘super-charges’ the external website by doing all the native things only it can do (typically notifications, etc.) while the website handles all the UI (more on how this actually works later).
Hybrid apps were much more appealing to us, since it allowed us to build a very thin Electron wrapper that acted as a 'browser' within which we could then load different applications in the warehouse. This made the deployment path much more appealing, since ‘updating’ an app would essentially amount to refreshing the page. Also, it meant we could re-use all the same workflows and tools that we use for all our other internal websites rather than having to maintain a custom Webpack config and CI setup just for our Electron tools.
We called this hybrid mishmash of a browser and native “Electron Wrappers.”
Setting it all up
There are a lot of small details you have to set up when you make an Electron app. Things like handling what happens when all windows of an app are closed:
// Quit when all windows are closed
app.on('window-all-closed', () => {
  // On macOS it is common for applications and their menu bar
  // to stay active until the user quits explicitly with Cmd + Q
  if (process.platform !== 'darwin') {
    app.quit();
  }
});
Explaining how to do these things feels like a poor use of your time since the Electron documentation will always be a better (and more up-to-date) than this blog post.
Instead we’ll focus in on the bare minimum needed to explain how we’ve decided to implement hybrid electron apps at Echo. In other words I’ll aim to explain the crux of it instead of re-documenting Electron.
If you are reading this to actually implement this yourself (rather than just out of curiosity) you may want to first read Electron's introductory tutorial on setting up your first app: https://electronjs.org/docs/tutorial/first-app
Basic setup
The first thing to do is to set up the main window of your app. This means:
- Creating a window when the app starts
- Loading an external website on load
To do this, in the main entry file we create a BrowserWindow. A BrowserWindow is probably Electron’s most used module: it allows you to load a URL or file like a browser.
import * as path from 'path';

import { app, BrowserWindow } from 'electron';

// Keep a global reference of the window object, if you don't, the window will
// be closed automatically when the JavaScript object is garbage collected.
// This is according to: https://electronjs.org/docs/tutorial/first-app
let mainWindow: BrowserWindow;

function createWindow() {
  mainWindow = new BrowserWindow({
    width: 1200,
    height: 900,
    webPreferences: {
      preload: path.join(__dirname, './setup-bridge.js'),
    },
  });

  mainWindow.loadURL('https://your-website.com');

  mainWindow.on('closed', () => {
    mainWindow = null;
  });
}

app.on('ready', () => {
  createWindow();
});
When creating a BrowserWindow there are a myriad of options available (webPreferences in the code above). The one we are specifically interested in is preload since it allows us to specify a script that will be executed before every webpage is loaded in a BrowserWindow.
Importantly, the preload script has access to Node APIs. This is the secret sauce for our hybrid setup. It means we can inject some functions into the window of our BrowserWindow which any internal tool can access. This is how we ‘bridge’ native and web.
From the example above, this is our “setup-bridge.js” file:
// An example printer utility:
import { getPrinter, setPrinter, getPrinters, print } from './printer';

window.bridge = {
  getPrinters,
  getPrinter,
  setPrinter,
  print,
};
In this example we're inserting some function we wrote into the window that lets us manage printers. The website you then load can suddenly, magically, call window.bridge.print('hello'). Injecting methods like this is how we are able to support all the native things we need for our warehouse operation and yet still build web based tools.
However, the one downside of injecting the magical bridge is that every website has to know the specific methods available in the bridge, and we would end up sprinkling window.bridge.something() calls throughout all of our apps. To prevent this what we decided to do is to publish a small client to NPM to use our Electron wrapper methods.
This is a simplified version of our client once again only with the printing related utilities:
interface Printer {
  name: string;
  isDefault: boolean;
}

export interface Bridge {
  getPrinters: () => Printer[];
  getPrinter: () => string;
  setPrinter: (printerName: string) => void;
  print: (
    printData: ArrayBuffer,
    type?: 'TEXT' | 'RAW' | 'PDF',
  ) => Promise<string>;
}

type Client = Bridge & {
  isElectron: () => boolean;
};

const win = window as any;

// Injected by electron in our preload script
const bridge = (win.bridge || {}) as Bridge;

const client: Client = {
  isElectron: () => win.bridge !== undefined,
  ...bridge,
};

export default client;
If you strip out all the type declarations, all this is really doing is creating an NPM package whose default export is window.bridge. Additionally, we add an additional small isElectron utility method which our web apps can call in order to know whether they are being used as a normal website or within our Electron wrapper.
Once this client is published to NPM, our apps can do this:
import client from '@echo-health/electron-wrapper';

if (client.isElectron()) {
  client.print("We're hiring.");
}
Lastly, now that we have a client, and because we are using Typescript, we can slightly improve our bridge to make sure it always matches what the client expects. To do this we can use the interface defined as our client when setting up our bridge:
import { Bridge } from '../client';

import { getPrinter, setPrinter, getPrinters, print } from './printer';

declare global {
  interface Window {
    // This ensures that any methods we insert into the window below
    // match what our client thinks they are.
    bridge: Bridge;
  }
}

window.bridge = {
  getPrinters,
  getPrinter,
  setPrinter,
  print,
};
Now, if we change the signature of print() when working on our Electron wrapper, Typescript will highlight that we might break what web apps are expecting.
This highlights an important weakness in our setup. Our preload script injecting methods directly into the window means that if we change or remove a function we have to carefully plan releases.
For example if we were to rename print to createPrintJob we’d have to:
- Update our Electron Wrapper to have the renamed method
- Publish a new client
-
Stop everyone from using the affected tools so we can:
- Update affected web apps that use the old
printfunction to use the new client - Update the installed version of our Electron Wrapper so they work with the update web apps
- Update affected web apps that use the old
Realistically for this reason we’ve simply been quite careful updating our Electron Wrapper and have avoided backwards incompatible changes.
Normal Electron apps avoid this problem by bundling native and web app updates into a single binary. By splitting the two, we’ve created this problem for ourselves. All said and done however it's not been that big a deal for us since printers and scanners don't change that often so consequently our printing API is unlikely to change.
That’s it
So far, this approach has worked really well for us. It allowed us to:
- Build simple run-of-the-mill web React apps
- Leverage serial devices such as printers, NFC pads and scanners in our warehouse
- Support multiple operating systems (Linux, Windows and OSX)
- Keep our list of different tech stacks small and manageable
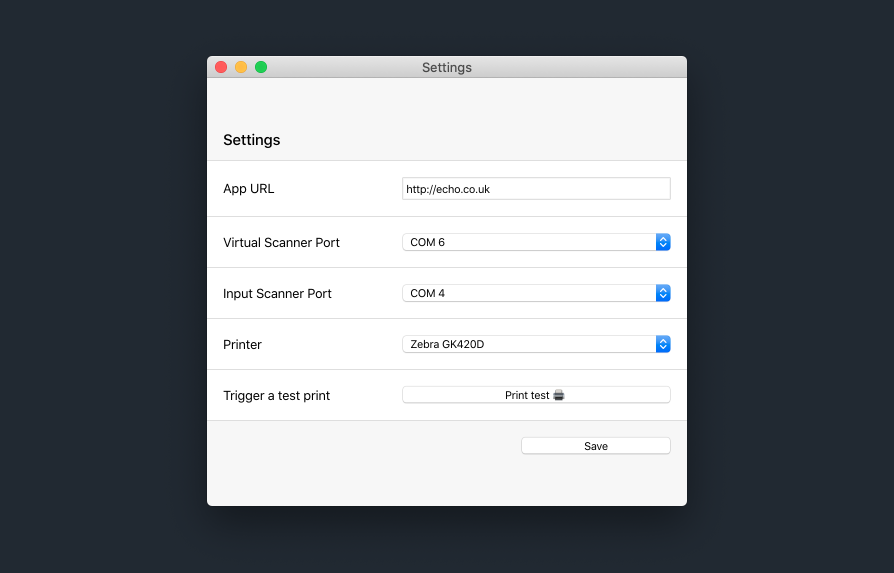
To make this setup work even harder for us, we ended up adding a small settings window in our Electron app that lets you pick which app you want to load in it. This means that we only have to maintain a single Electron Wrapper and have not had to touch it since its first release (besides some minor bug fixes of course).
Being new to Electron we’d love any feedback on our approach and whether there is an even better way to do this!
Further reading:
Follow us on @BuildingLloydsD